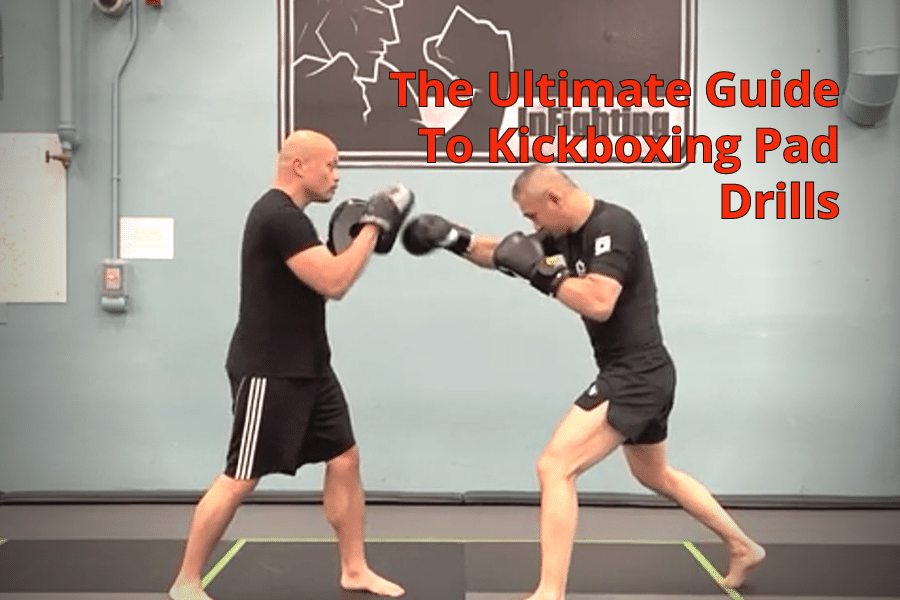
This is the ultimate guide to Kickboxing pad drills. This guide will show you how to use focus mitts, thai pads, and kicking shields to help you hone your kicking and punching skills.
Focus Mitts
The first section of our Ultimate Guide To Kickboxing Pad Drills is Focus Mitt training. Think of Focus Mitts as round disks that you wear on your hands. Your hands represent your face and your partner punches your hands instead of punching you in the face! 😃
Running And Hitting
This is a staple kickboxing drills exercise to get your heart racing and to help train you to keep your hands up! This is a straight left punch followed by a straight right punch. Stay on your toes and bring your knees up high as you’re punching.
Running And Hitting – Uppercuts
Same as before only instead of straight punches, you’re throwing uppercuts. Remember, your fists are palm up when you’re throwing uppercuts!
Running And Hitting – 1, 2, 5, 6
Running once again as we’re throwing punches. This time, we’re combining both straight punches with uppercuts. 1 is a straight left. 2 is a straight right. 5 is a left uppercut. And a 6 is a right uppercut. Go through this endless combination while pumping your knees.
1, Step, 1, 2
Here’s our first kickboxing drills combination. Starting off with a 1, a straight left hand. Then the pad holder feeds a 2, a straight right hand. The puncher steps back to evade the punch; and then, comes back with a 1,2, a straight left and straight right combination.
1, Slip, 3
The puncher initiates this combination with a straight left (1). The pad holder feeds a straight right (2). The puncher moves his head outside to slip the punch; and then, follows up with a left hook (3). For this combination the 3 goes to the body; but, you also do the 3 as a head shot.
1, 2, Slip, 4
The puncher starts this combination with a straight left (1) and a straight right (2). The pad holder comes in with a straight left hand (1). To defend, the puncher moves his head to the outside (slip right); and then, completes the combination with a right hook (4) to the body.
1, 2, Duck, 2
The puncher executes a straight left and a straight right combination. Now the pad holder feeds a (1) a straight left hand. The puncher lowers his head straight down (this is called a Duck) to defend; and then, finishes with a straight right hand (2).
1, 2, Cover, 2
The puncher throws a straight left (1) and a straight right (2) combination. The pad holder feeds a (3) a left hook. The puncher defends the 3 by covering the side of his head with his right glove; and then, immediately fires a final 2 to finish the combination.
1, Slip, 5, 2
The puncher initiates with a left jab (1). As the focus mitt holder feeds a straight right hand (2), the punch slips and moves their head to the outside. The follow up is a left upper cut (5) and a final straight right hand (2).
1, 2, Slip, 6, 3
The puncher starts things off with a straight left and a straight right (1,2). The focus mitt holder then feeds a straight left (1), which forces the puncher to slip and move their head to the right; thus, setting up the right uppercut (6) and a final left hook (3). This is one of the most fun kickboxing drills you can do!
Duck 4
The focus mitt holder feeds a large exaggerated left hook for the puncher to duck under. The duck is simply lowering your hips to evade the punch. The puncher counter attacks with a right hook (4).
Duck 3
The focus mitt holder feeds a right hook for the puncher to duck under. Remember to drop your hips on the duck. The counter attack is a left hook (3).
Low 4, Low 3, High 4
The focus mitt holder starts things off with a big, exaggerated left hook so the puncher can safely duck underneath it. The puncher throws two punches to the body, a right hook (4) and then a left hook (3). The final punch is a high right hook (4).
Low 3, Low 4, High 3
The focus mitt holder feeds a big, extended right hook for the puncher to duck under. Immediately upon the duck, the puncher throws a low left hook (3) to the body; and then, follows up with a right hook (4) to the body. The final punch is a high left hook (3).
1, 2, 3, Cover, 3
The puncher starts things off with a 1,2,3 combination – a straight left, a straight right, and a left hook. The focus mitt holder feeds a right hook to encourage the puncher to bring his left hand back to his temple to cover the attack. The final punch is a left hook (3).
3. 4. 3, 4
Here’s a staple 4 punch combination. Keep your chin down and your abs tight as you throw your left hook (3) and your right hook (4).
Switching 2’s
A straight right hand is typically called a 2. A 2 is also referred to as a straight rear hand. For this drill, the puncher is alternating their stance and a straight rear right hand; and then, a straight rear left hand.
Switching Hooks
This kickboxing drill is about power, coordination, and footwork. Starting with a left foot forward stance, throw a low right hook to the body and then a high right hook. Next, switch your feet so it’s your right foot forward and throw a low left hook to the body and then a high left hook.
Elbows
When you’re throwing elbow strikes, point your pinky finger to your nose – this will make your elbow strike almost perfect right away. Note that you want to grab the back of the focus mitt as you’re striking. Doing this ensures that you’ll never miss; plus, it will compound the force that you’re generating.
Skip Knees
By holding onto the focus mitts, you’re driving your knees straight up. Be sure to bring your heels close to your hip at the moment you impact the focus mitt.
Elbow/Knee Combo
Execute a right elbow strike; and then with both hands hold onto the focus mitt and land a right knee strike. Alternate to the other side so that you throw a left elbow strike along with a left knee strike. This is one of the most important combinations for self defense.
Thai Pads
Thai Pads are thick foam and leather pads that cover the length of your forearm. They’re a versatile piece of equipment for kickboxing drills because they allow you to practice both your punches and your kicks.
1, 2, 10
Here’s a classic kickboxing drills combination that starts with your straight left jab (1), your straight right hand (2), into your right kick (10)
2, 1, 9
This a slightly more advanced kickboxing drills combination. Starting things off with a straight right hand (2), we’re now going to throw a straight left punch (1) while at the same time switching our feet so that our left foot pops back. Doing so allows for greater power when we execute the left kick (9).
1, 2, 10, 2, 1, 9
This is one of my favourite kickboxing drills. Start off with a straight left punch (1), into a straight right punch (2), along with a right kick (10). Then, right away go into a straight right punch (2), with a straight left punch (1), into a left kick (9). This is what I call an endless combination and should be done with smoothness and fluidity.
10’s
Here we’re working on our right hook kick. Sometimes, this is called a roundhouse kick or a round kick. Keep your left hand up. And be sure to turn your left foot to power the kick.
9’s
We’re repeatedly working our left hook kick with this drill. Remember, to turn your right foot to power the kick. And always have at least one hand up at all times to protect your head.
2, 10’s
This kickboxing drill helps us combine both our punches and our kicks. This is a fantastic drill is you’re a total beginner to kickboxing. Focus on smoothness as you throw your right kick on the retraction of your right punch; and then, throw your right punch on the completion of your right kick.
1, 9’s
Here’s a kickboxing drill focusing on an endless combination with your left punch (1) and your left kick (9). Fluidity is everything for this drill. And there should be a rhythmic approach to this kickboxing combination – kick/punch/kick/punch – there’s no pause or break in between strikes.
9’s And 10’s
This kickboxing drill is great for hip dexterity, coordination, and cardio. Launch a left kick (9) and then immediately a right kick (10) and then back to a left kick. Try to keep a consistent rhythm and stop only when the round is done!
Switching 9’s
Have your left leg forward; and then, pop your left leg back so you have greater distance to manufacture power for your left kick.
Switching 10’s
Starting with your right foot forward, pop up and switch your feet so that your right foot is back and your left foot is forward. Immediately, as your right foot pulls back and hits the floor, execute your right kick.
See It And Hit It
This is one of my all time favourite kickboxing drills. As soon as you see the right pad, throw the straight right punch. As soon as you see the left pad, throw the straight left punch. A stack of pads to the left means a right kick. And a stack of pad right means a left kick. This drill is great for reaction time.
Switching Superman’s
A Superman punch is when you launch a right kick as a set up; and then, right away throw a right punch. With this drill, we’re switching from the right side to the left side. Meaning, directly after your right/right combination, you’ll transition directly to your left kick/left punch combo.
Moving 2, 10
Here’s an intermediate to advanced kickboxing drill. You’re throwing your right kick along with your straight right punch in an endless combination. While you’re doing this, your partner is moving forward and back so you have to adapt to the alternating distance.
Moving 1, 9
Same as the earlier kickboxing drill only with the left side. On the retraction of your left punch, you’re throwing your left kick and as your left kick descends, throw your left punch. As your partner changes the distance and moves you forward and backwards, do your best to maintain your rhythm and never stop!
Thai Pads And Shin Guards
Cover, 2, 10
Use your right shoulder, right forearm, and left hand to cover your partner’s left kick. Immediately counter attack with a right punch and a right kick.
Cover 1, 9
Defend your partner’s right kick by covering with your left shoulder, left forearm, and right hand. Directly after covering, switch your feet so your right foot is forward; and then, throw a left punch and a left kick as a counter attack.
Shin Block, 2, 10
As your partner throws a left kick, lift your right shin to block the kick; and then, directly throw a right punch combined with a right kick.
Shin Block, 1, 9
Your partner is throwing a right kick. Defend the kick using your left shin to block the strike. Directly after you block, switch your feet so your right foot is forward and launch your left punch followed by your left kick.
Cross Block, Spinning Back Kick
Your partner is throwing a left hook kick. Lift your left shin to block the strike. Your left shin block allows you to step across so you’re in position to launch your right spinning back kick. Be sure to lift your right knee up to your chest as you look over your shoulder to aim the kick.
Kicking Shield
Cover/Kick, 10’s
Your partner swings the kicking shield at you and you defend with both forearms to cover up. Immediately launch your right kick.
Cover/Kick 9’s
As your partner tries to hit you with the kicking shield to your left side, use both forearms to cover up and defend. Your partner immediately pulls the shield back into position to absorb your left kick. This is a really fun drill that simulates actual sparring but with everyone staying absolutely safe 🙂
Alternating Foot Jabs, 7’s & 8’s
This is one of the best kickboxing pad drills that you can do! Keep your hands up, your elbows in, and remember to lift up your knee as you try to step on your training partner’s heart! 😆
Double Shield, Alternating Left Hook Kicks
Both you and your partner have kicking shields on your right shoulder. Alternate back and forth, taking turns throwing left hook kicks.
Double Kicking Shield, Right Hook Kicks
With both you and your partner having kicking shields, you can both work your kicks. With the kicking shield on your left shoulder, you’re both taking turns throwing right hook kicks.
Right Curved Knee
With both of your hands on your partner’s right shoulder, lift up your right knee for a devastating knee aimed at your partner’s chest.
Left Curved Knee
Place both of your hands on your partner’s left shoulder. As you step forward with your right leg, lift up your left knee so that you’re in position to launch your knee strike. It’s called a curved knee because your knee moves in a curve – as if it’s moving along one side of a rainbow. 😃🌈
Left Curved Knee Into Right Kick
Your partner holds the shield to the front of their chest for your left curved knee; and then, turns the kicking shield over to their left side as you execute your right kick.
Right Curved Knee And Left Kick
Step in for your right curved knee and then step back so you have the correct distance for your left hook kick.
Right Knee/Right Kick
Step in to throw your right knee and then step back so you have the proper distance to throw your right kick.
Left Knee/Left Kick
As you step in, place both hands on your partner’s right shoulder to assist you in your knee strike; and then, be sure to step back so you have the correct range to launch your hook kick.
Right High Kick
Your partner is going to hold the kicking shield as high as they can as you kick as high as you can. This is one of those kickboxing pad drills that is all about pure power!
Left High Kick
Be sure to thoroughly warm up first before launching your high kicks. Lean back, point your toes, and keep your right hand up!
Low Left Hook Kick
Step in and bend your right knee for this kick. You’re aiming for your partner’s calf with this kick.
Low Right Hook Kick
Bend your left knee as you step across to launch your right low hook kick. Aim for just above your partner’s left ankle.
Shield And Focus Mitt
1, 2, 10
Your partner receives your straight left punch and your straight right punch while holding a right focus mitt. Your then has a kicking shield in their left hand to take your right kick.
2, 1, 9
Start this Kickboxing pad drill with your straight right punch (2). Now as you throw your straight left punch (1), switch your feet at the same time; thus, bringing your left foot back. Complete this combination by launching a left kick (9).
Right Crescent, Right Kick
Your partner is holding a left focus mitt as a target for your right crescent kick. Remember, your right crescent kick moves in a clockwise circle. Step in slightly so you have the correct stand for your right hook kick.
Left Cresent, Left Hook Kick
Your partner has a focus mitt in their right hand; thus, providing a target for your left crescent. Your left crescent kick is a counter clockwise circle with your left foot. Step forward with your right foot so you have the proper distance to land your left hook kick.
Left Knee/Left Kick
This Kickboxing pad drill is all about speed and less about power. As you draw your left knee up, focus on bringing your left heel close to your hips so that your knee is a sharp penetrative tool. As soon as your left foot lands, immediately launch the left kick.
Right Knee/Right Kick
Focus on keeping your feet fast! Imagine that the floor is hot as you launch your right knee along with your right kick.
Left Knee/Right Kick
Skip from your left knee directly into your right kick. You want to try and launch your right kick before your left foot lands on the ground.
Right Knee/Left Kick
Try and scissor your legs in the air as you kick after your knee strike. This kickboxing pad drill is not only fun but it’s a great way to understand how to develop power for your kicks!
7, 1, 2, 10
This is one of my all time favourite kickboxing drills combinations. Start things off with a left foot jab (7). Immediately follow up with a straight left (1) and a straight right (2); and then, complete the combination with a right hook kick (10).
8, 2, 1, 9
Start this combination off with one of the most effective linear kicks you can throw, your right foot jab (8). Follow up with a straight right punch (2) and a straight left punch (1). And then, complete this combination with a left hook kick (9).
Running And Hitting With 9’s
Keep your heels up and lift your knees as you’re punching in this classic running and hitting drill. This classic kickboxing drill is made more complex by periodically adding in left kicks!
Running And Hitting With 10’s
Pump your knees while extending your punches like you’re running in place. Periodically, add in a right hook kick. The key thing is to add the kicks without interrupting your running and punching pattern- it’s harder than it looks!!
:
:
Check out my Precision Kickboxing Masterclass video instructional series!
The A to Z system for learning Kickboxing as fast as possible 😃
You’ll learn:
- Detailed fundamentals
- Advanced combinations
- Punching and Kicking defense
- Effective counter attacks
- Solo and partner drills
- How to use training equipment
- Safe Sparring progressions
- Winning fight strategies
You can watch this anywhere on your phone, tablet or laptop.

Click here to check out my Precision Kickboxing Masterclass! 😃